 40 days hiking in the wilds requires that you think hard about the gear you do and don’t take along for the ride. Our through hike of the Australian Alpine Walking Track (AAWT) in Sept 19 – Nov 19, even for a seasoned hiker, was going to be a challenge not only of Trish my wife and I but of all our equipment. Every and I mean ‘every’ piece of kit was scrutinised and evaluated even gear we had relied on and been happy with for years. Key aspects we needed were efficacy, durability and low weight. Being in possession of a katadyn mini filtration unit and a steripen both of which had provided lasting and reliable service for some years I was a bit skeptical when Darren from Untamed Flies and Tackle showed me the new ‘Befree’ from Katadyn. A filtration unit and bottle coming in lighter than most 1lt water bottles - and what was the go with the squishy bladder style bag. Offering a respectable weight saving of over 300g plus a bottle from the previous setup it was worth a try. Especially when your carrying your gear on your back for around 700ks. So how did it go? On a hike as long as the AAWT you are bound to have some gear challenges and gear failures (tired and sore bodies, solar chargers, communications, spork,…. Anyway you get what I mean) but I’m glad to report the Befree didn’t miss a beat, it performed flawlessly for the whole adventure filtering countless liters of water. The squishy bottle which is a little strange to start is surprisingly durable, we didn’t coddle any of our gear and the squishy bottle put up with all the dings and mistreatment any bottle would have and probably more. It was also great to be reducing the volume of your bottle as you go too, taking less room in your pack every time it got used (until you refill of course). The squishy bottle is of course necessary to effectively use the filter system. The speed at which the unit filters is amazing and also effortless. Moving from the Katadyn mini to this system was an incredible step change – I used to joke about the process making you more thirsty than the water it rewarded you with the mini, this was the reason I also had a steripen in my kit (only clear water can be treated with a steripen without filtration). Needless to say a year or so on from tackling the AAWT the Katadyn Befree is still getting plenty of use, hiking, fishing and hunting never see me leave home without it. The Katadyn Befree is a dream come true for light weight hiking, fishing, hunting or just about any outdoor pursuit. Get onto Darren from Untamed Flies and Tackle and get one. 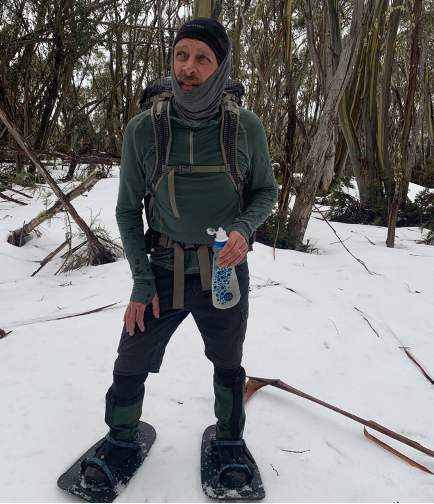 By Dion Stevenson – 30.9.19 snowshoeing across the Baw Baw plateau whilst walking the AAWT 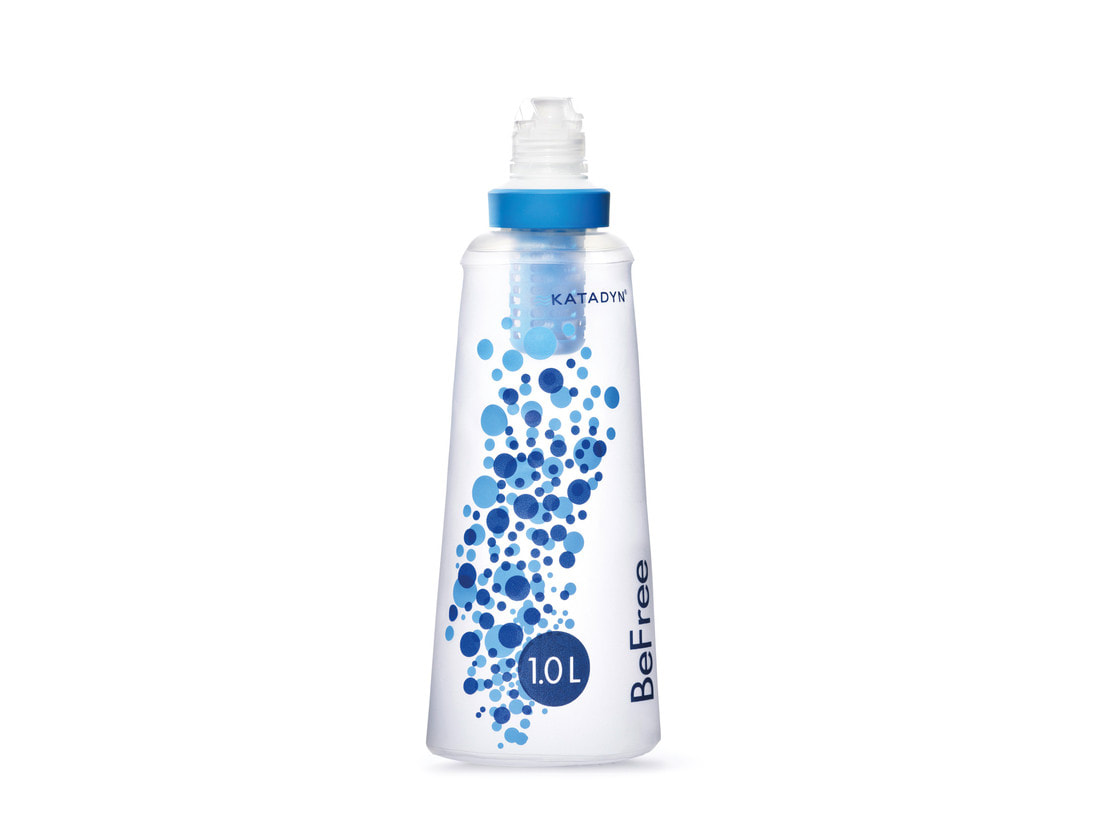 Katadyn BeFree water filtration system
0 Comments
Wuhan – you suck!! I’ve had to cancel half my Guiding season, my 2020 Untamed CXI trip has been postponed to 2021, and my custom fly tying has fallen off a cliff. Not to mention what this Lockdown has done to retail sales… We will however get through this Pandemic intact, and luckily for us, we have an awesome customer base who have been a fantastic support so far. I have noticed that everyone is going a bit stir crazy at the moment (and that's me being kind), so I thought I’d suggest a few ideas to help you work on a plan for when restrictions are finally lifted, particularly for us poor Victorians. Practice your Casting Everyone has already been tying flies like crazy, and if you are really dedicated, you’ve also been taking the opportunity to work on your casting. If you haven’t – start practicing today, your later self will thank you!! There have been plenty of great casting tips during the lock down, so look up the likes of Chris Dore and Leigh Dowell to name a couple. For my own casting, I have a reel with a dedicated casting line on it, and using it for practice does two things:
I have some great options for casting lines, and they start at only $60, so let me know if you need one. Fresh Eyes I’ll be surprised if we are “allowed” to venture too far from home when they relax our current lock down, so what I’m going to suggest is that you look at your local fishery with fresh eyes. Get out a map, see where you have not fished before and then plan to do some exploring. Rivers, lakes, estuary, beach, whatever you have near you. Look at your gear. Is it in good shape? Is there a new leader on your line? Is the line cracked? Is it clean? Do you have the right gear and flies to focus locally? If you find yourself short of a few things, or if you have some JobKeeper money burning a hole in your pocket, we specialise in all aspects of outfitting our customers with the best gear for all budgets and situations, and we would love to help you out. I’d like to finish this quick blog by thanking everyone for their support during this tough time, we really do have the coolest customers! Stay safe. Cheers Darren 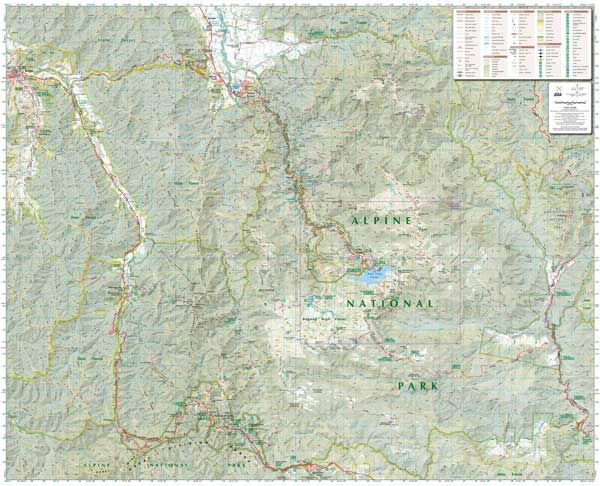 We also sell maps if you need one! 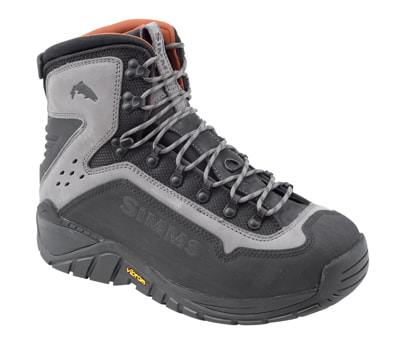 I have bad feet, and when you spend as much time wading as I do, good wading boots are worth their weight in gold.
I’ve just spent the past season wearing Simms G3 wading boots, and I’m going to keep my statement about them pretty simple - their comfort and performance is far above any other boot I’ve ever worn. I also added some Simms Hardbite Studs, and Simms Alumibite Star Cleats, and grip whilst wading is amazing. Some feedback from regular customer Peter Quigley sums up the G3 boot beautifully: I just picked up a pair of the new Simms G-3 guide boots from Darren at Untamed Flies and Tackle and fished in them for three consecutive days in difficult rocky conditions. To say I’m impressed would be an understatement. There are not many wading boots I haven’t tried and I’ve found it impossible to get any boot over the past 20 years to allow me fish in comfort. These new boots from Simms are a game changer. Super comfortable, they feel light and agile. The eyes for the laces seem to extend closer to the toe allowing for a tighter fit and it also seems that there is a little more space in the toe box of the shoe. The grip is exceptional as always and the build looks solid and capable of many years fishing. If you are looking for a new pair of boots it will be very hard to beat the new Simms G-3 Guide boots. Peter Quigley Last thing I will mention is that the boots are definitely dual purpose, as they excel at both wading and hiking. This = comfort. I have a large range in store, so either pop in, or jump online to try some for yourself: https://www.untamedfliesandtackle.com.au/store/p1102/Simms_G3_Guide_Boot 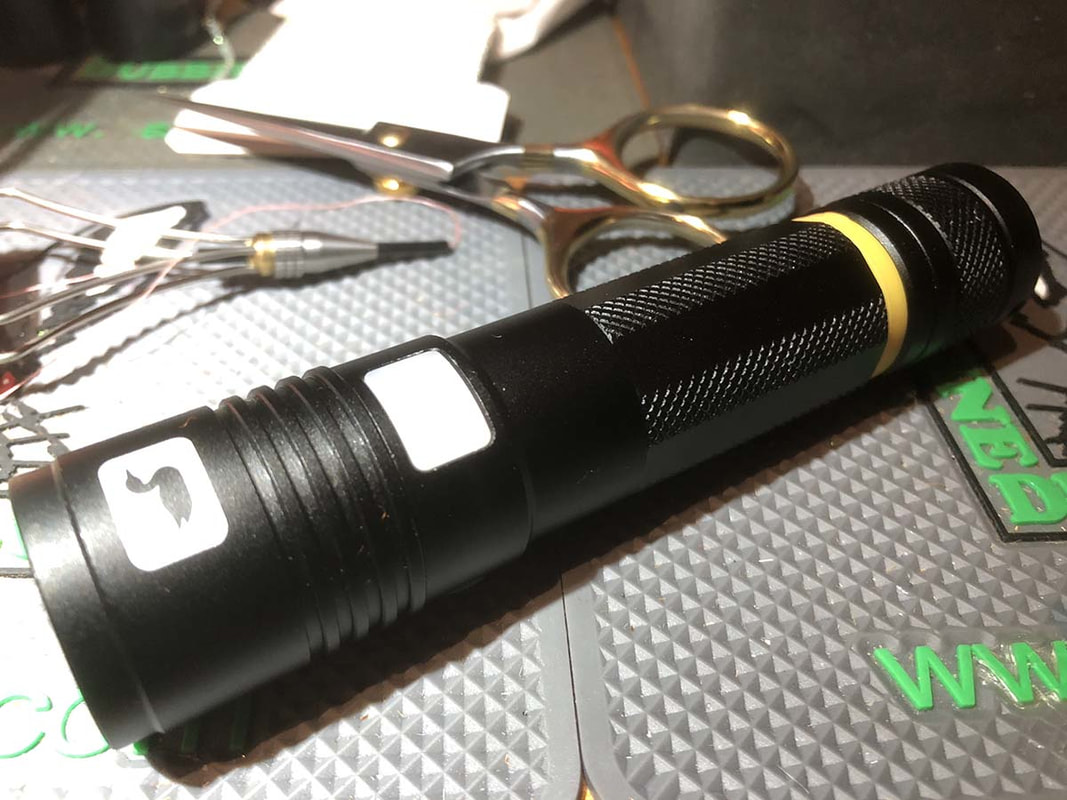 I’ve been using the Loon Infiniti UV light for the past 3 months, and its time to share the love.
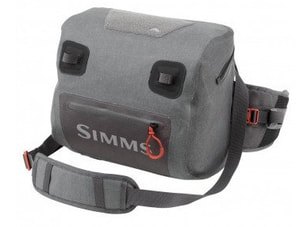
Tying commercially has certainly taught me that all UV torches are not created equal. Most cure resins too slowly, and you end up with a tacky finish, regardless of which resin you use. Others fry the resin by setting it too quickly, and you see smoke come from the resin when this happens. Enter the Loon Infinity. It sets resin quickly, tack free, and once I adjusted to the button being in a different place to my old Loon Megalight, I was absolutely stoked with its performance. Here is a really cool feature, it comes with a 2200mAh 18650 rechargeable battery, and the torch is recharged by plugging in the supplied USB cable and connecting to a computer. I wasn’t sure how full the battery would be from new, so I charged it fully when I first received mine to see how long I’d get from a full charge. I was intending on writing this review once the first charge ran out, but after three months, and at least 10 boxes of bonefish flies later, it is still going on its first charge! Anyone who knows me will tell you that I’m a fussy bugger, and that I have absolutely no time for anything that doesn’t work well. The Loon UV Infiniti is the real deal, and it has my full endorsement as the best UV torch you can buy for your tying. You know you need one: https://www.untamedfliesandtackle.com.au/store/p1169/Loon_Infinity_UV_Light.html 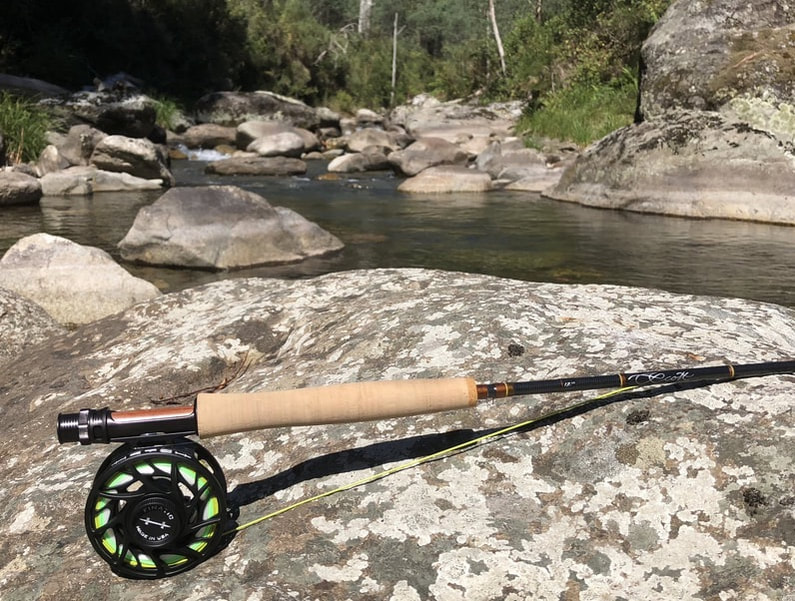 I snuck off for 3 days fishing a couple of weeks ago, and made a beeline straight to my favorite location – the “Nunya”. My fishing partner was Steve, who had flown down from Queensland for his annual combined business/fishing trip. We collected the usual gourmet cheese and sourdough from Milawa on the way past, as its always important to fuel the body appropriately whilst enjoying a few refreshments around the campfire at night. Once the goodies were packed into the car fridge, we were off into the mountains. There are 2 ways to get to the Nunya, and we chose what is normally the quickest and easiest route. Unfortunately there was a large tree down and blocking our way only 200m from camp, so we had to turn around (think Austin Powers 103 point turn) and then make the 2 hour journey back and around the other way. We eventually made it to our campsite, performed an express camp setup, and then we put our gear together to hit the water. The Nunya is one of those rivers that is usually pretty sleepy until the sun hits the water, so we hadn’t really lost that much quality fishing time. By now, Steve was absolutely chafing at the bit. He had just purchased a new Scott G Series 8’4” 4wt/Hatch 3+ outfit for this trip, and after travelling down from the Sunshine State, it was finally time to christen it. I suggested that he should fish the first pool, and he had the Airflo Elite Trout line onto the water before I had even finished my sentence. The smile on his face was broad, and his loops were tight. We experienced 3 days of countless fish. Nothing big, but most fish were in the 10"-14" range, which were heaps of fun on the 3 & 4wt rods. I fished an 8'4" 3wt Scott G Series with a Hatch 2+ on the first day. This thing casts every line I've run over it beautifully, and has barely left my hand all season. I stepped it up day 2 and used an 8'8" 4wt Scott G Series with my Hatch 3+, and it is just as impressive an outfit as the 3wt. Both rods have loads of power, feel, and are super smooth. They flex beautifully with a fish on, and in short - the Scott G's are just a magnificent rod series. Keep your eye out for a more detailed end of season review... 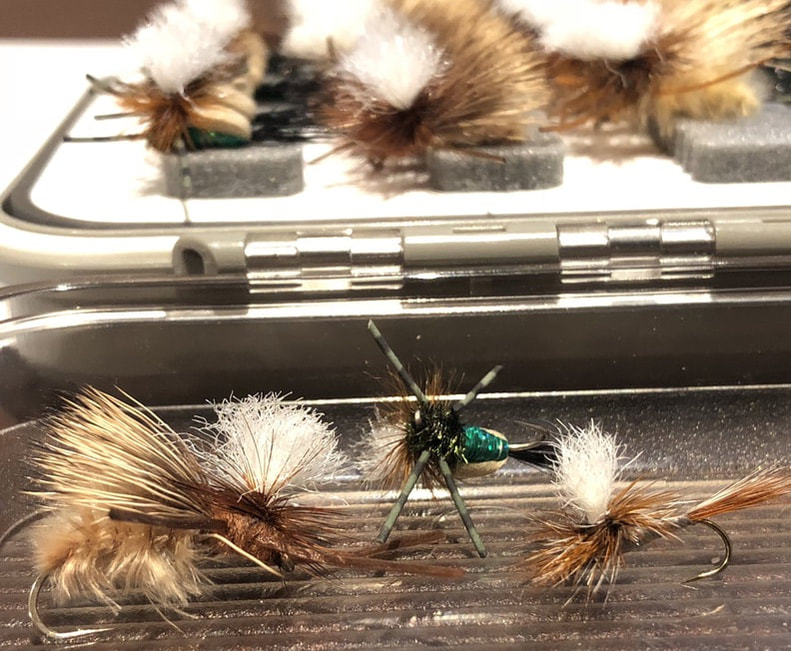 Flies The fishing was that good, I don't think I even tied a nymph on for the trip. Most drys work well on the Nunya, but I do have have 3 standout flies that are absolute favourites: All 3 are dynamite anywhere, not just on the Nunya. The Nunya? People are far too quick to publicly share names of rivers these days, particularly rivers that will not cope with the extra pressure of hoards flocking to it after reading an article from a magazine or the internet. Limited fish numbers, limited access, or a host of other reasons could be at play, but please consider this when penning your latest trip. The Nunya is one of those rivers that takes a considerable amount of effort to get to as a day trip, but it can be done. It used to be one of Victoria’s best kept secrets. Almost everyone I know that fishes it treats it like “Fight Club”, and the first rule of Fight Club is that you never talk about Fight Club. This is about respect for the fishery. If you recognize my pictures, please be respectful and DON’T name the Nunya in the comments, as I’ll delete it as soon as I see it. Get Out There You can’t fish from an armchair, or from behind a keyboard, but you can get out some maps, or log on to Google Earth and do some virtual exploring to help make a plan for your next adventure. You never know, you might even find your own Nunya… 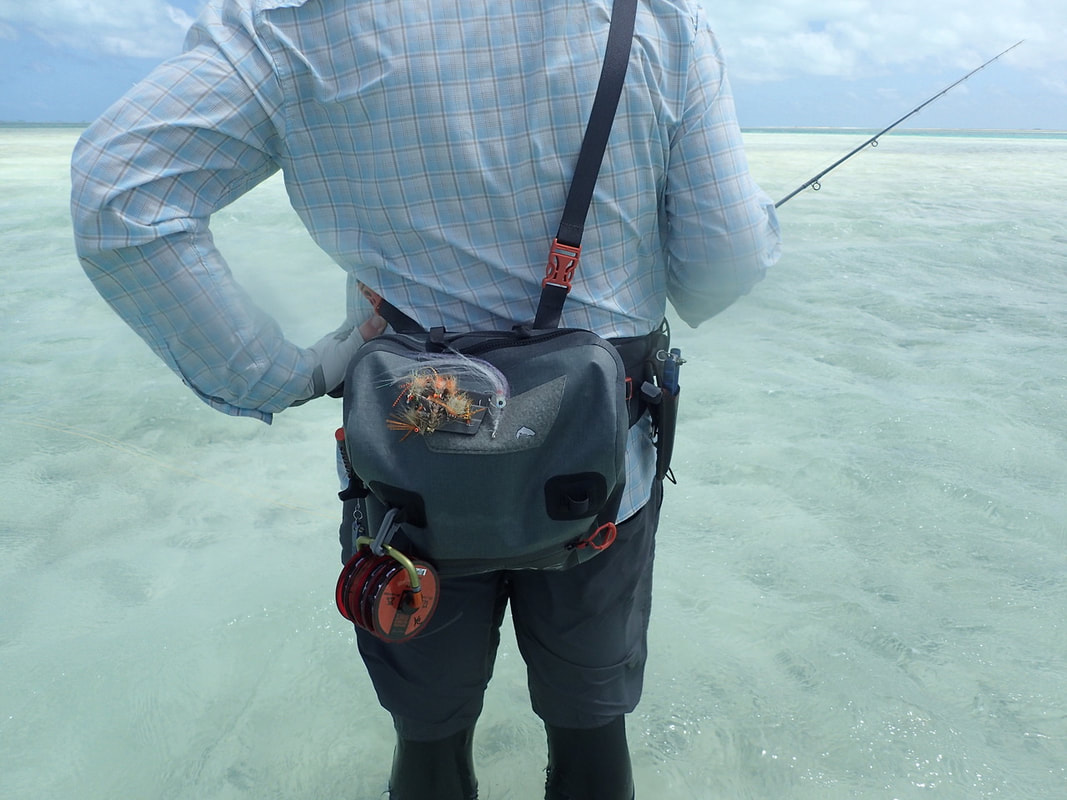 The search for the perfect wading pack seems to be an ongoing challenge for the flats fisherman. More often than not, hip packs are either too big, too small, not waterproof, impractical, uncomfortable, and the list goes on... I acknowledge that pack choice is a very personal thing, and we each have unique preferences, or even quirks in regards to gear. This must be a hell of a challenge for manufacturers, and is where I dip my lid to Simms, as each year their gear just keeps getting better and better. I was fortunate to have received a pre release Simms Dry Creek Zip Flats Pack to take on my last trip to Christmas Island for evaluation, and I was absolutely stoked with how it performed. So much so, I've purchased it, even though it was a loaner for the trip.
 It has a fully padded hip belt that is best described a luxurious in comparison to anything else I've tried. It incorporates adjustable side-hip compression straps to enable fine tuning, as well as a great place for attaching accessories that can be clipped over them. This was the perfect place to attach my Hatch Pliers, as they were out of the way when not required, and easily accessible when I did need them. Combine this with the fully cushioned breathable foam back panel, and the adjustable shoulder strap (that is also removable), and you have a very comfortable day's fishing in front of you. Simms have also incorporated roll-up strap retainers to reduce line catching points on all excess adjustment straps. These are a very clever addition, and work they extremely well. Pack Size The pack is a little over ½ kg in weight (24oz), and has an 11lt capacity. I found this to be the perfect size/volume for everything I need for a day on the flats. I typically carry 2 large, and 1 medium C&F fly box, an insulated water bottle, pliers, camera, spare sunnies, glasses cleaning kit, eye drops, spare reel, leaders, finger tape, snacks, and a few other bits and pieces. I attached a Fishpond Headgate Tippet Holder to the outside of the pack for quick access to my tippet material, as well as a Simms retractor to the magnetic tool port on the side for my nippers. The magnetic tool port also has a place for my Dr Slick Scissor Clamps. The front faced zipper pocket may not be waterproof, but it is the perfect spot to store a couple of leaders for quick access. The pack also has a generous field loop patch on the top. You can use this area to store used flies as is, but I added a Simms Super Fly Patch and it worked really well. It will also be a great place to attach a velcro floatant holder for the freshwater flyfisher. There is also an integrated net scabbard in the rear. Pack Architecture The pack has fully welded seams, and a semi rigid construction. It's 840D TPU fabric feels more like stiff wader material to the touch, which is quite different to the heavy and rubbery waterproof pack materials of the past. Along with its obvious waterproof properties, it is very light, highly resistant to abrasion and punctures, and is a great step forward in waterproof pack materials. The zip used is a submersible #6 TIZIP® zipper, and it provides the optimal balance between waterproof protection, and ease of opening/closing. I found the zip easy to use, particularly in comparison to earlier models, and it opens the pack up wide for complete access. Quality waterproof zips are what you pay the big bucks for, as they add a very large cost to the packs manufacture. If you like the look of this pack but its above your budget, it is also available as a roll top at a much lower price point. More information is available on the roll top here: Simms Dry Creek Roll Top Hip Pack If I want to access something in my hip pack, I want almost instant access, so for me, the ease of use that the zip offers far outweighs the extra cost over the roll top. Once fully zipped up, you can not squeeze any air out of the pack, demonstrating how waterproof these things really are. I will finish this review by simply saying that I will be taking the exact same pack with me to Christmas Island in 2018. Feel free to click on the link below if you'd like more information, or would like to purchase a pack of your own: https://www.untamedfliesandtackle.com.au/store/p1117/Simms_Dry_Creek_Zip_Hip_Pack.html 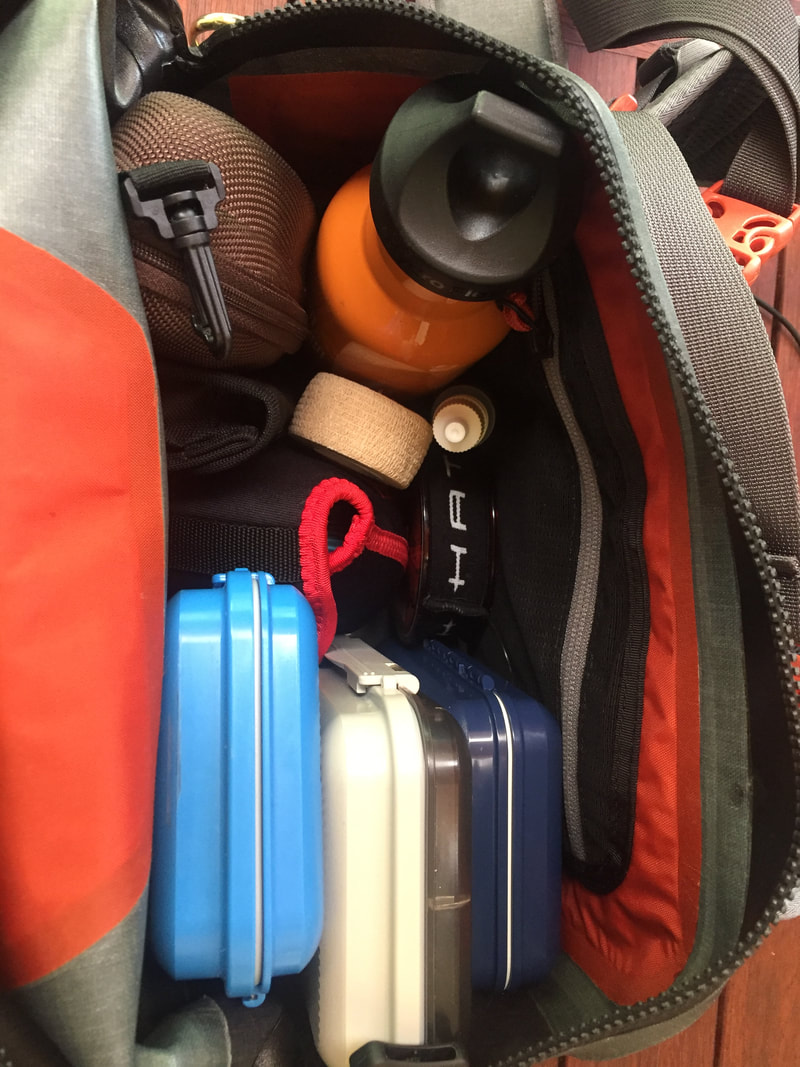 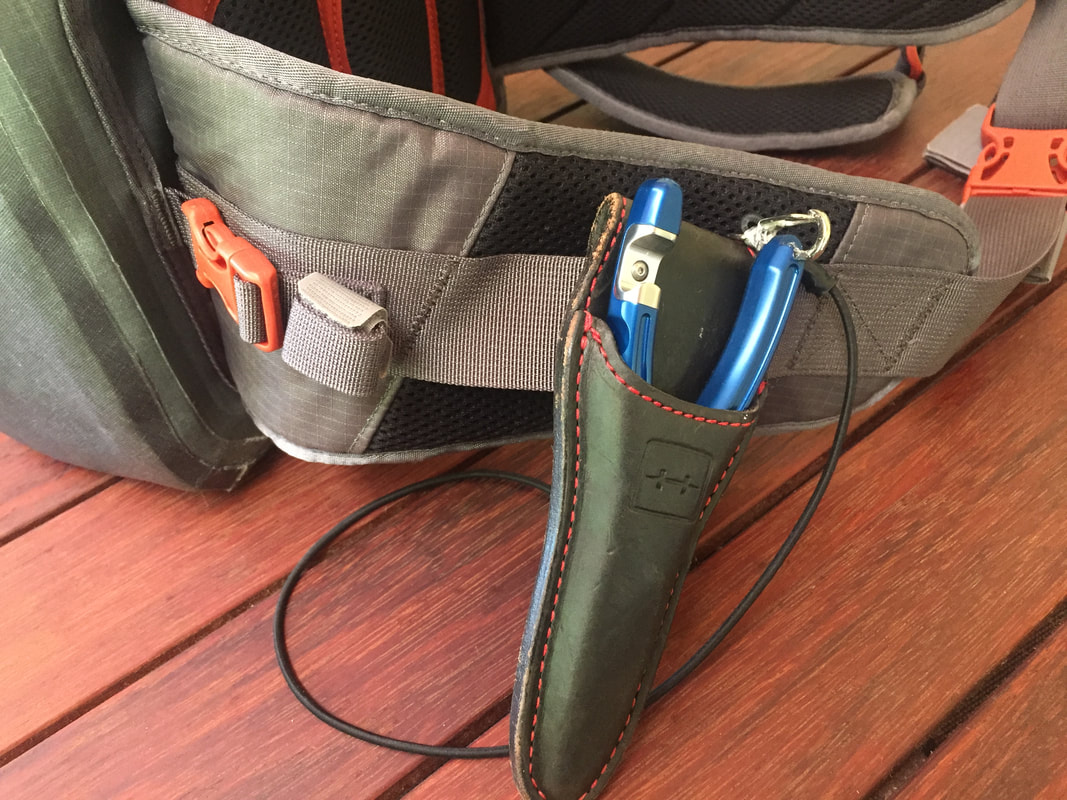 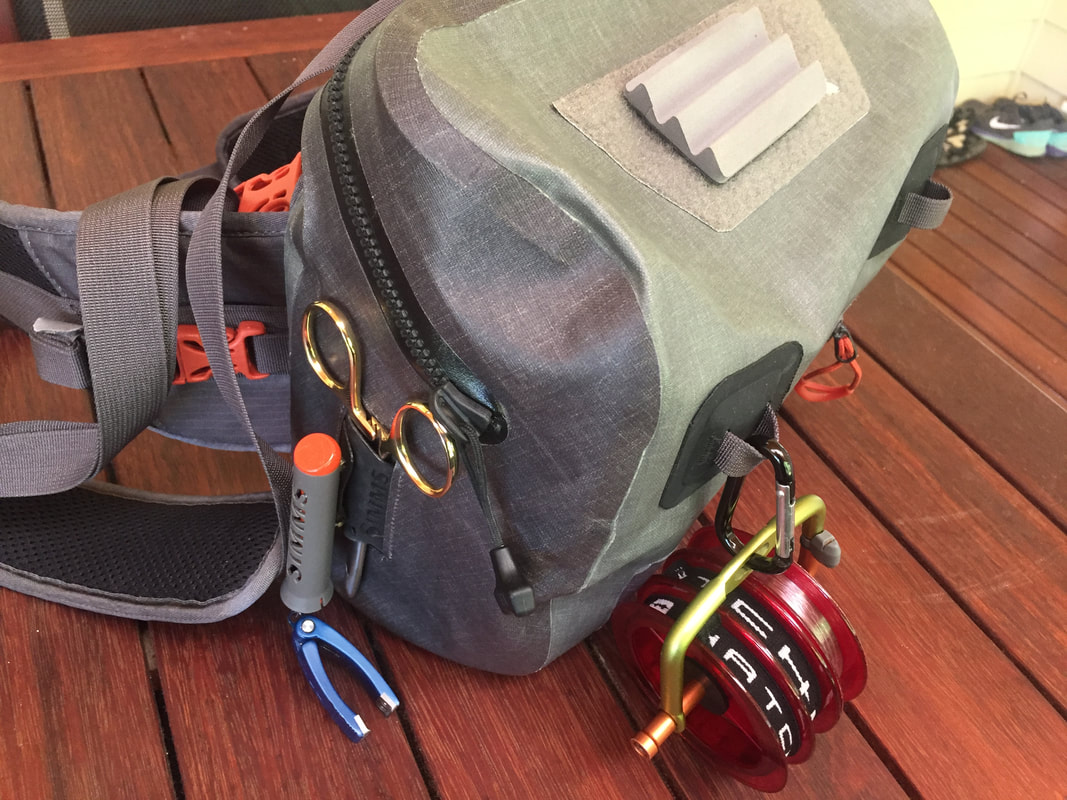 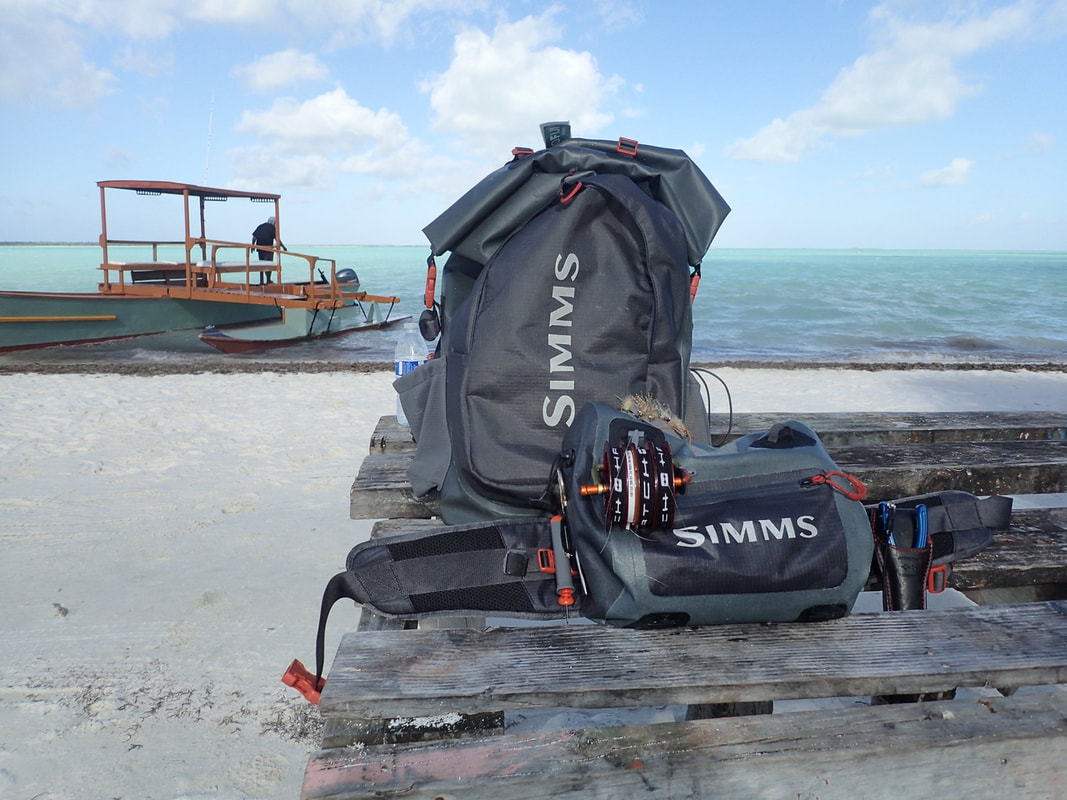 Have you checked out my Simms Dry Creek Back Pack Review?
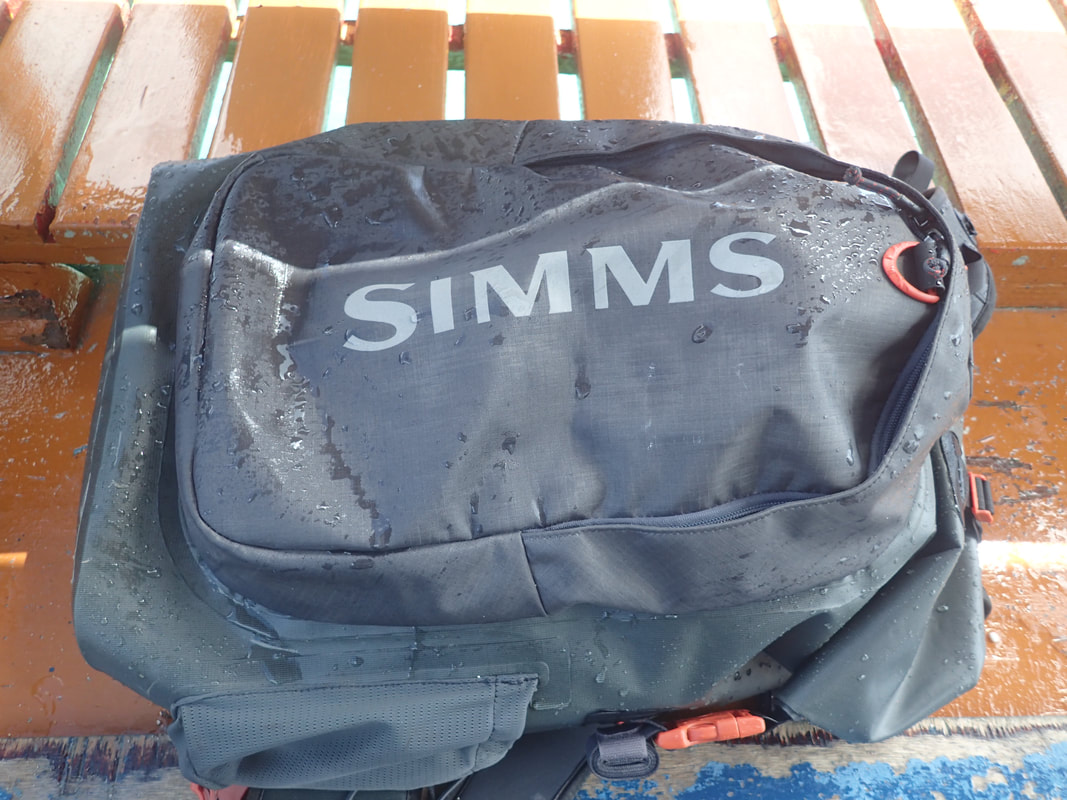
I was very excited when the backpack arrived in a delivery from Manic Tackle Project, as I could tell straight away that the bag and I were going to get along brilliantly. Key Features of the Simms Dry Creek Backpack:
So how did the bag actually perform on the trip?
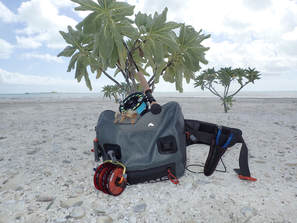
Once on the island, I emptied the bag of my travel bits and pieces, and loaded up the main waterproof compartment with my full remote area first aid kit (which proved handy a couple of times), spare reels, jacket and snacks. The bag then took up duty as my waterproof boat bag. It proved to be robust, waterproof, and effortless to transport to the boat an back each day. The rod tube sleeve also gave me somewhere safe to store a broken rod on one occasion. Win, again. 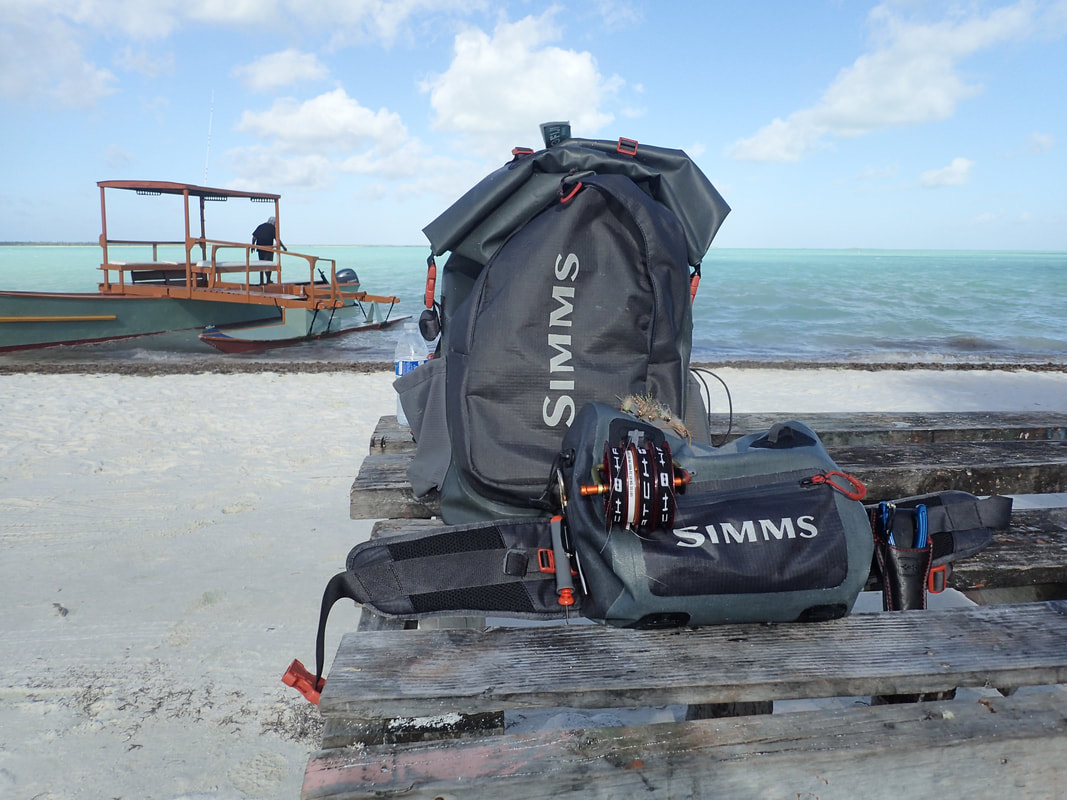 The Simms Dry Creek roll top Backpack, alongside the yet to be released Dry Creek Z Hip Pack. Given I also tested the Simms Dry Creek Z hip pack on this trip, there was no need to use the Backpack as a day pack. I normally spend several days each week wearing a day pack whilst guiding during the trout season, so by lugging 7kg in the bag throughout airports and different islands, I know this thing is going to excel as a waterproof day/2 day pack. It is comfortable, has an exceptionally well thought out design, and will keep your gear dry if it rains, or if you go arse up in the water. The Catch & Release system compatibility with Waypoints® Convertible Chest Pack adds so much functionality to this bag, and I can't wait to give it a run when trout fishing. The exterior pockets are a massive win, even if they are not waterproof. This is a feature that has been sorely lacking in waterproof packs up until now, as they have really just been glorified, upmarket dry bags. In a nutshell, the Simms Dry Creek Backpack receives a MASSIVE 2 thumbs up from me, and I'm pleased to say at the my search for the perfect multi use bag is now over! If you'd like a Simms Dry Creek Backpack of your own, they are available now, and there is more information HERE. 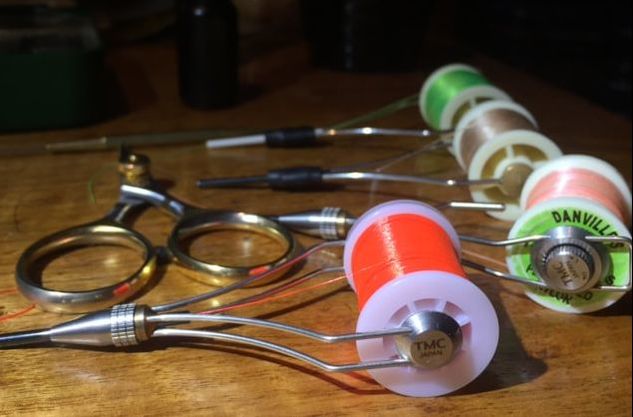 I tie over 5000 bonefish flies a year, and spending this amount of time at the vise, you become rather intimate with the tools you use. One tool I am very passionate about is my tying thread bobbin. I have a desk full of different bobbins that I’ve tried over the years, most are ordinary and have failed for some reason or other, and I’ve relegated these to dispensing ribbing wire. Most importantly, I also have a great selection of standouts, and its no coincidence that these standouts are all made by Tiemco. There is one feature that I believe is essential to a good bobbin – a ceramic tube. Why? Simple - your thread breaks less. You can also put more pressure on your thread than you can with a non ceramic bobbin. Tiemco pioneered the use of ceramic tubes for protecting threads during the tying process, and remain the only company to utilise high-quality Japanese ceramics in their bobbins. I use 4 different Tiemco bobbins, below is a brief description of each: 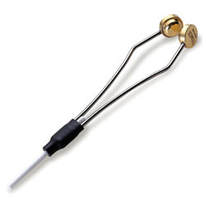 TMC Ceramic Straight Bobbin – standard RRP $39.95 This is the best value, high performance bobbin available on the market. Like all Tiemco bobbins, it is made in Japan with quality materials. Every fly tier needs at least one of these on their bench. 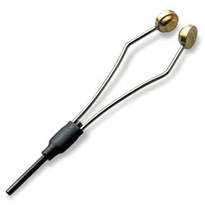 TMC Ceramic Straight Bobbin – Heavy Duty RRP $46.00 This is the same design as the standard model, but built with a heavy-duty ceramic tube for use with thicker threads. The HD model ideal for saltwater and bass patterns, as well as large streamers. Like all TMC ceramic bobbins, the ultra-smooth ceramic tube will not damage or cut threads. 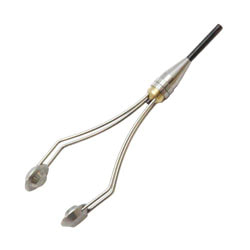 TMC adjustable double arm bobbin - Heavy Duty RRP $99.95 The TMC Adjustable Double-Arm Bobbin is an innovative bobbin which holds the thread spool with four stainless wires. The ceramic tube can be also adjusted vertically to any position. This bobbin also has a substantial knurled finger grip to hold on to, which gives the user firm control, and provides far less fatigue when tying for long sessions. This is by far my favourite bobbin, and I always ensure that it has the thread colour I use the most on it. 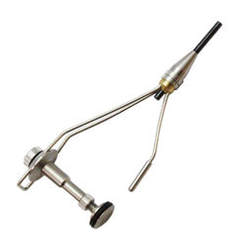 TMC adjustable magnetic bobbin – Heavy Duty RRP $139.95 The TMC Adjustable Magnetic Bobbin is an innovative bobbin holder which controls thread tension with magnetic force. If you are a bit of a gadget person who likes hi-tec and extremely well designed things, you will love this bobbin. I’m a bit more of a pick it up and use it type of guy, so I needed to follow the instructions pretty carefully to make the most of this bobbin. Additional features include; vertically adjustable ceramic tube, thread keeper, and self-standing design. It works really well when you take the time to dial it in correctly. So my advise is to do your tying a favour and invest in a decent bobbin or two, you won't look back!
I'm looking forward to testing a heap of new gear on Christmas Island this week. Here is what made the cut, and what fit in the Simms Bounty Hunter 100 Roller. If the item has an asterix, I packed one in my carry on (all essentials that you are allowed to carry on) . 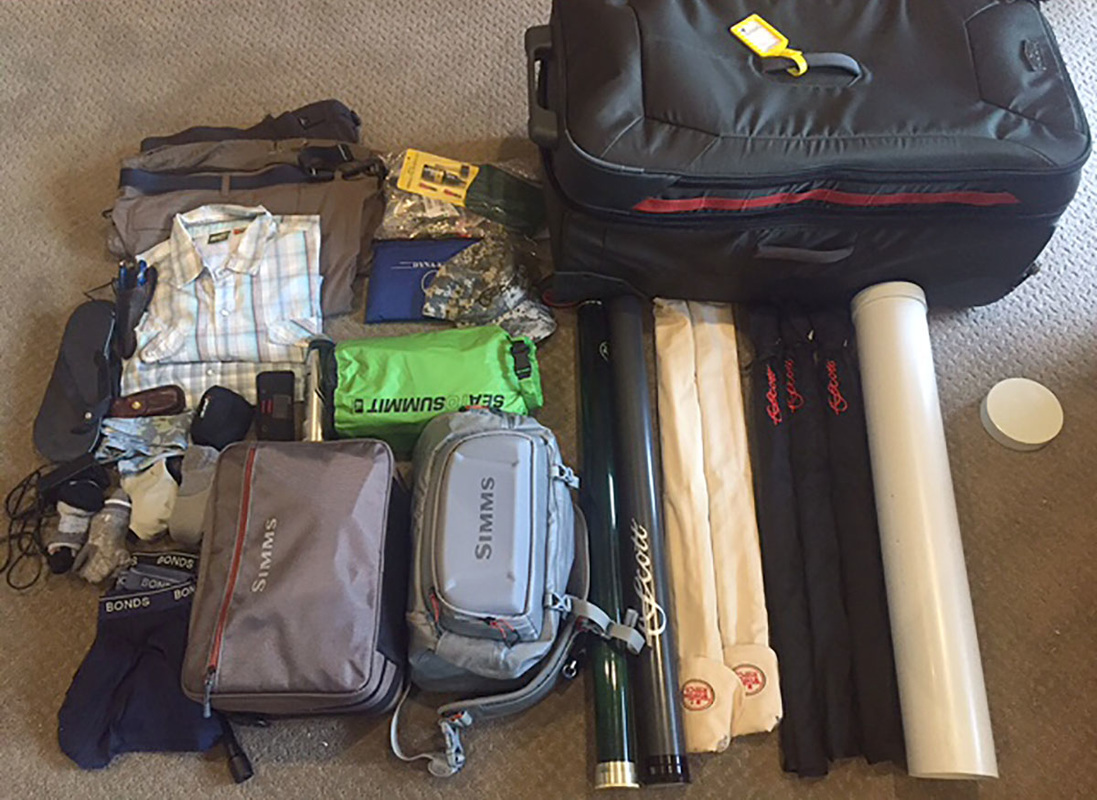 Scott #7wt MERIDIAN Scott #8wt MERIDIAN Scott #12wt MERIDIAN Scott #12wt MERIDIAN (backup GT rod) with tube Winston #7wt Winston BIIIX Winston #7wt Winston BIII Plus Winston #8wt Winston BIII Plus with tube Sage X #8wt with tube 100mm PVC Tube with caps for 5 rods Hatch 7+ L/A 7wt reel and spare spool Hatch 11+ L/A 12wt reel Hatch Line Nippers Hatch Nomad Pliers Harfin LR100 Reel and 2 spare spools 3 Fly Boxes of flies (1 x Bonefish, 1 x Trigger, 1 x GT) Simms Wading boots* Simms Headwaters Reel Brief Case Wading Socks x 3* Sun gloves x 2* Buff/Gaitors x 2* Tying Materials & Vice Hat x 2* Maui Jim Sunglasses Mala HCL Maui Jim Sunglasses Mala HT Maui Jim Kumu HCL* Glasses cleaning kit Sunscreen & Lip balm Thongs Boxers Spare flylines 2 x 7wt & 2 x 8wt 1 x 12wt Remote Area First aid kit. Fishing shirts and shorts - 2 sets* Stingray Watertights* Evening/travel wear - 1 x shorts, 1 x pants, 1 x shirt, 1 x vest* North Face Rain Shell Simms Bounty Hunter 100 Roller Sims G4 Pro Waterproof Sling Abel Retractor Nikon D80, 50mm 1.4 & charger* Olympus TG4 waterproof camera* Insect Repellent 5 x Hatch FC Tippet material FC - 12lb, 16lb, 20lb, 60lb, 80lb 8 x 9ft Tapered leaders – Hatch 9' 12b, 16lb, 20lb 6 x 9ft Tapered leaders – Rio 10' 12b, 16lb Vet Wrap – finger protection from line burns Stripee finger guard Passport* Tickets* Cash* - $1000 (enough to allow the purchase of the required "peace offerings" on the way home in duty free) Ipad* Leatherman Toiletries/Medicine* Reading/tying glasses* Headphones* Mobile Phone* Phone Charger Head torch Drybag for boots on return Bag weights Bounty Hunter 100 Roller 22.6kg Carry On bag 7kg 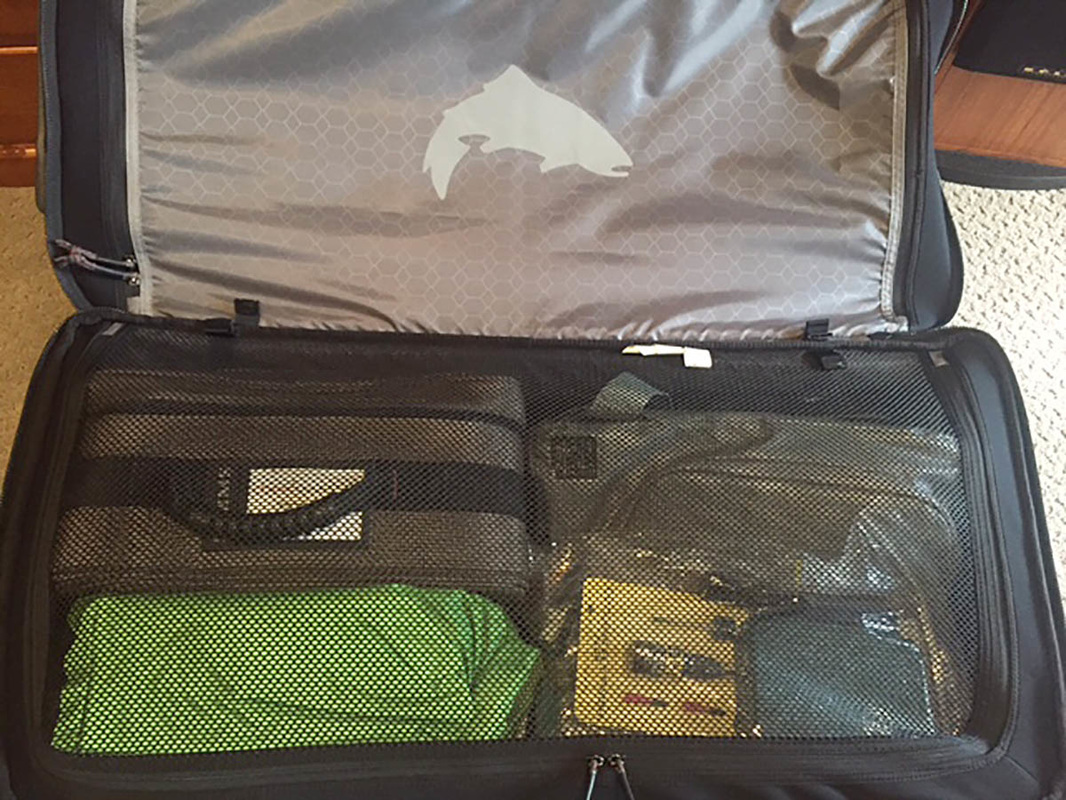 I love the design of the Simms Bounty Hunter 100! 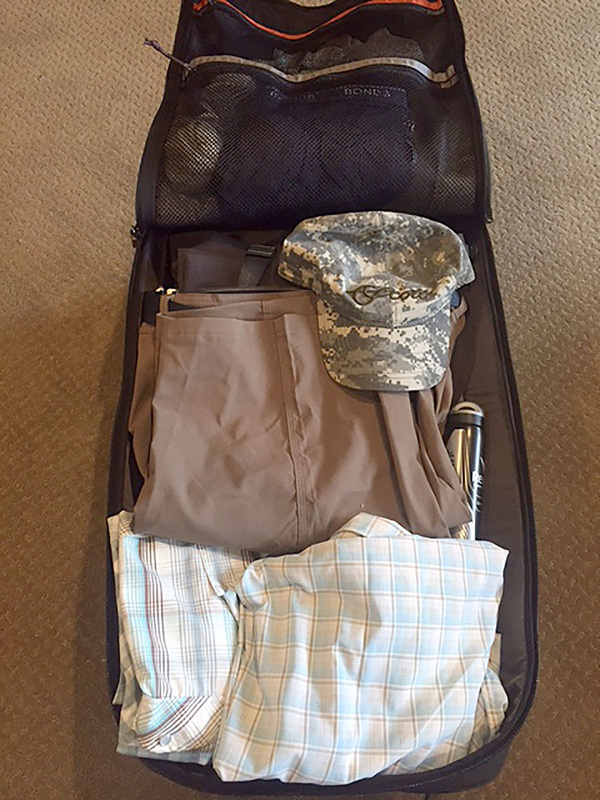 There is room for lots more in the bag, but given the amount of heavy gear I have packed, it's essential clothing only! 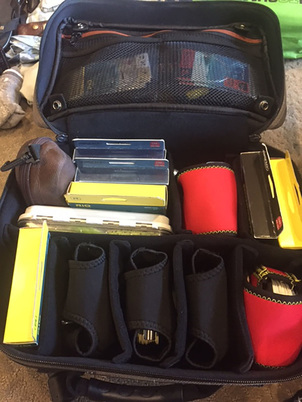 I LOVE the Simms Headwaters Reel Brief Case, makes packing reels, lines and lots of other gear a breeze. Here's hoping that the Airline doesn't loose my bag!
I'm off to CXI in July, and have been researching travel bags pretty heavily during the last 12 months or so. I'm taking lots of gear with me, so I need the best bag I can find to accommodate it all. My bag requirements:
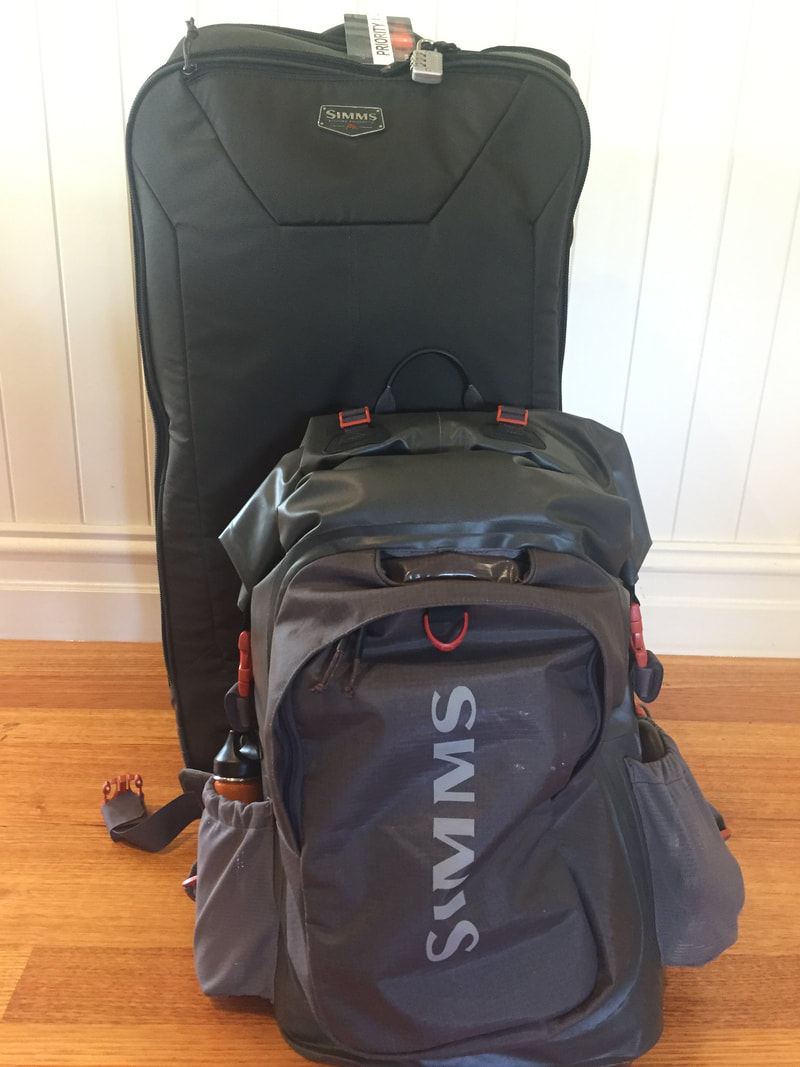
The final choice in the end was quite easy, as there was only one bag that satisfied all my requirements - the Simms Bounty Hunter 100 Roller. 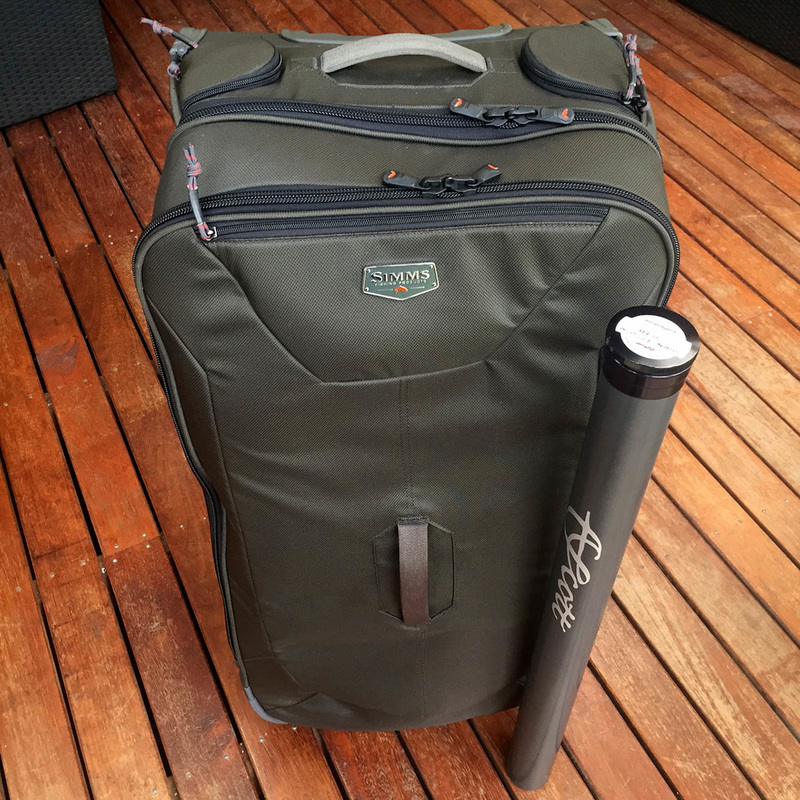 DesignThe bag is a clamshell design with stretch gussets to maximize packing capacity, zip-away internal dividers, compression straps to condense your stuff, and interior mesh pocket organisation. There are lots of options for packing this bag, but I will use the bigger bottom section to store my gear, and the smaller top section for clothing. 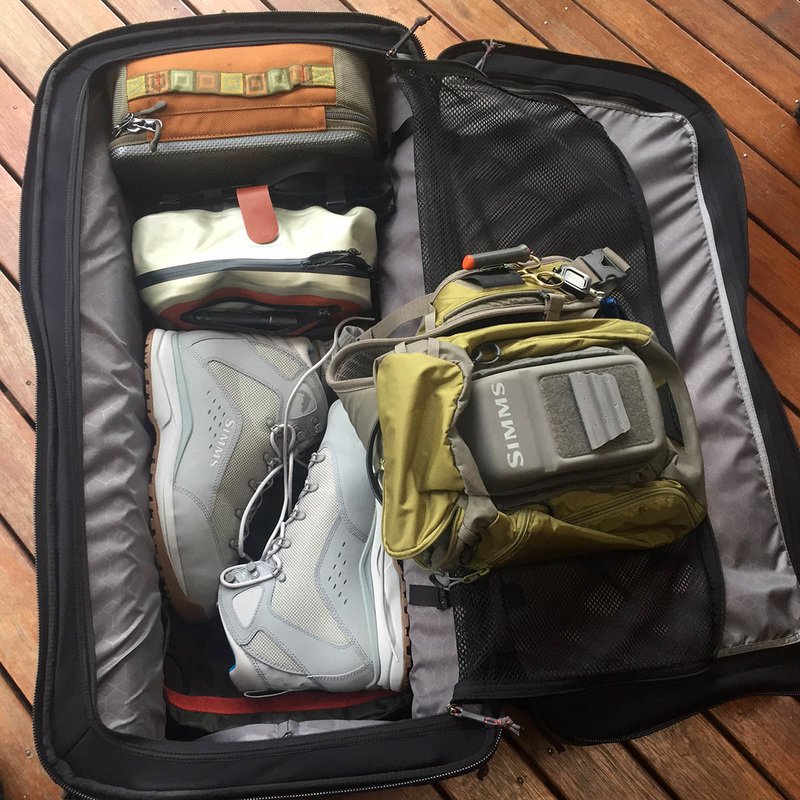 For scale, the wading boots are size 13 and over 30cm long. Rod storage I always travel with lots of gear, and the most important feature I was looking for in a new bag was the ability to pack lots of rods both easily and safely. The Simms Bounty Hunter 100 has 2 exterior rod tube access points that fit 2 rod tubes each, so that takes care of 4 rods in their tubes. These access points are lockable, and the tubes are housed inside internal storage sleeves within the walls of the bag. With 2 rod tubes in the top walls of the main compartment of each side of the bag, the really cool thing is the rest of my rods will fit safely without tubes by sitting under where the hidden tubes extend into the main bag (pictured below). This means I can save weight by leaving my other rod tubes at home. If you are not comfortable with this approach, the bag will accommodate the usual 100mm PVC pipe with caps that most traveling anglers use in their bags for protection. 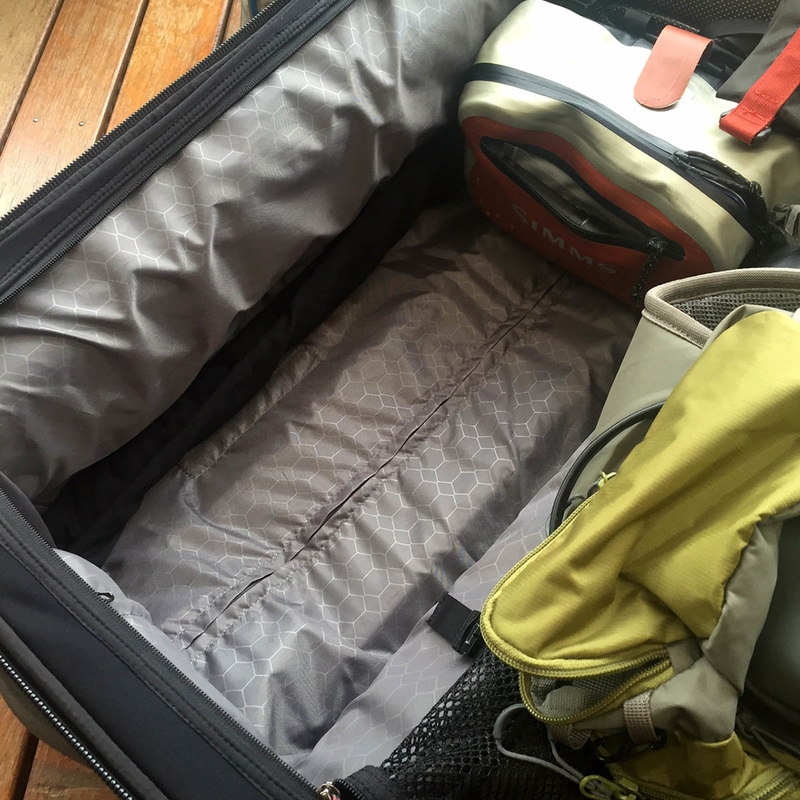 ClothesI really like the interior mesh pocket organisation in the top section - no more trying to find socks or jocks hidden somewhere in the bottom of my bag!  So what fits in the bag?I've performed one quick test pack with the bag, and all the gear pictured below (there are 5 rods and reels) came in at 16kg packed in the bag. I'll be adding another couple of rods and reels, a first aid kit, towel, and some tying gear, but will make my 23kg limit easily, particularly given I normally take my boots as part of my carry on luggage. 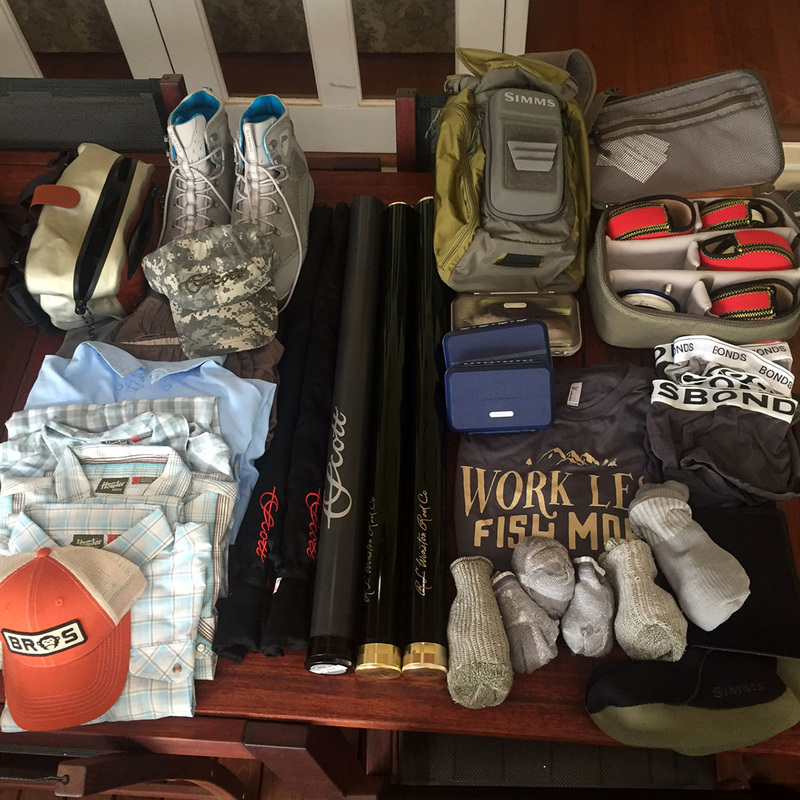 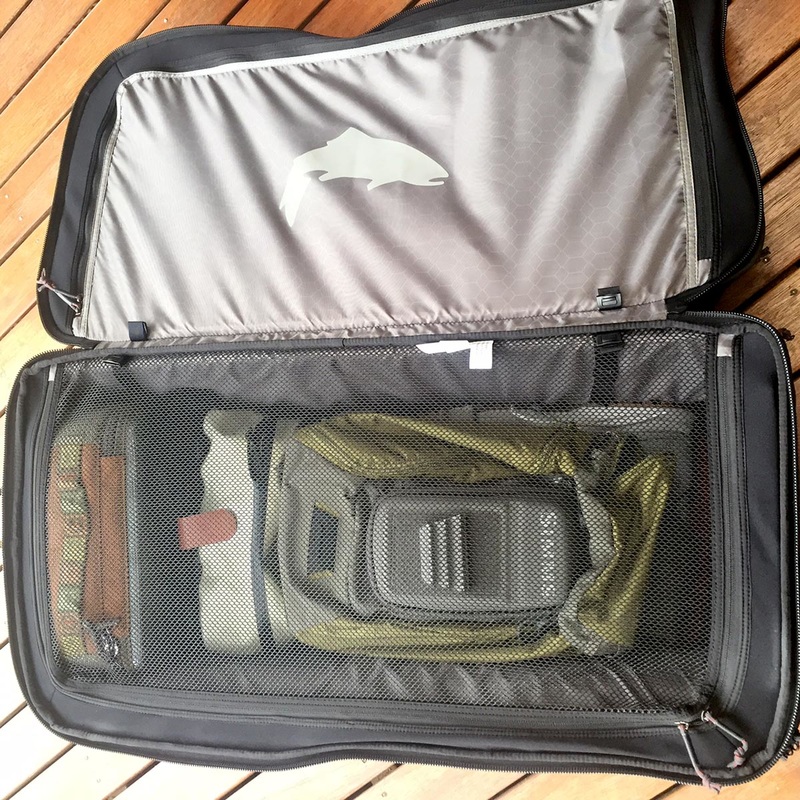 The zip-away divider does a great job. Bag SpecsAPPROX. WEIGHT: 4.55kg. CAPACITY: 100 L, SIZE: 76cm x 45.7cm x 35.5cm (30” x 18” x 14”) FABRIC TECH: Waterproof 1000D TPU nylon base; 600D PU coated nylon fabric SummaryI made a list of the gear I'll be taking to the Island with me, and given the total value of the gear, it seemed pretty stupid to compromise on my travel bag.
Simms make outstanding products, and the Bounty Hunter 100 is no exception. It has been specifically designed for fly fishermen, is high tec, rugged, has lots of substantial grab handles, and even comes with a seam-taped waterproof roll-top bag to store wet gear for the trip home! If you want the best fly fishing travel bag for International travel - this is it. You can get yours here: https://www.untamedfliesandtackle.com.au/store/p761/Simms_Bounty_Hunter_100_Roller.html |
AuthorDarren is a Fly Fishing Guide, Retailer, Fly Tier and self confessed Tackle Junkie. Archives
September 2020
Categories |
- Welcome
- Gift Cards
-
Flies
- Squish's Shrimp
- Aitutaki Flies
- Alphlexo Crabs
- Australian Flats Box Selections >
- Category 3 Trout Flies
- Chris Beech's Flies
- Crab Flies
- Chocklett's Changer Collection
- Christmas Island Flies
- EP Flies
- Essential Trout Flies
- Fulling Mill Salt
- Manic Trout Flies >
- Saltwater Flies
- Seychelles Flies
- Shrimp Flies
- The Lost Fly
-
Rods
- Reels
- Euro Nymph
- Fly Lines
- Simms
- Clothing
-
Cool Gear
- Backpacks Slings & Vests
- Bark River Knives
- Books
- Buff Filter Mask
- Buff
- C&F Fly Cases
- DVD's
- Fishpond
- Floatants
- Fly Boxes
- Footwear
- Forceps, Pliers, Nippers and Accessories
- Hiking & Camping Gear
- Howler Brothers Clothing
- Knives/Tools/Outdoors
- Loon Outdoors
- Luggage and Travel
- Maps/Navigator
- Moroka.30
- McLean Nets
- NZ Strike Indicator Tool
- Orvis
- Patagonia
- prAna Clothing
- Simms
- Smith Creek
- Stubby Holders
-
Fly Tying
- Alphlexo Body Tubing
- Bead Chain
- Bobbins
- Bucktail/Deer Hair
- Chenille
- Craft Fur
- Dumbell Eyes
- Dubbing
- Dyna-King Vises
- Enrico Puglisi Products
- Feathers
- Finn Raccoon
- Hareline Dubbin
- Hanak Hooks and beads
- Hooks Freshwater
- Hooks Saltwater
- Krystalflash
- Natural Materials
- Rabbit Zonkers
- Ribbing Material
- Rubber Legs
- Scissors & Tools
- Thread
- UV Resins and Glues
- Whiting Farms Hackle
- X-Crab Legs
- Waders and Boots
- Hunters Element
- Casting Lessons
- Postage
- Blog
- Contact Us
- Friends
- Clearance/Sale
 RSS Feed
- Welcome
- Gift Cards
-
Flies
- Squish's Shrimp
- Aitutaki Flies
- Alphlexo Crabs
- Australian Flats Box Selections >
- Category 3 Trout Flies
- Chris Beech's Flies
- Crab Flies
- Chocklett's Changer Collection
- Christmas Island Flies
- EP Flies
- Essential Trout Flies
- Fulling Mill Salt
- Manic Trout Flies >
- Saltwater Flies
- Seychelles Flies
- Shrimp Flies
- The Lost Fly
-
Rods
- Reels
- Euro Nymph
- Fly Lines
- Simms
- Clothing
-
Cool Gear
- Backpacks Slings & Vests
- Bark River Knives
- Books
- Buff Filter Mask
- Buff
- C&F Fly Cases
- DVD's
- Fishpond
- Floatants
- Fly Boxes
- Footwear
- Forceps, Pliers, Nippers and Accessories
- Hiking & Camping Gear
- Howler Brothers Clothing
- Knives/Tools/Outdoors
- Loon Outdoors
- Luggage and Travel
- Maps/Navigator
- Moroka.30
- McLean Nets
- NZ Strike Indicator Tool
- Orvis
- Patagonia
- prAna Clothing
- Simms
- Smith Creek
- Stubby Holders
-
Fly Tying
- Alphlexo Body Tubing
- Bead Chain
- Bobbins
- Bucktail/Deer Hair
- Chenille
- Craft Fur
- Dumbell Eyes
- Dubbing
- Dyna-King Vises
- Enrico Puglisi Products
- Feathers
- Finn Raccoon
- Hareline Dubbin
- Hanak Hooks and beads
- Hooks Freshwater
- Hooks Saltwater
- Krystalflash
- Natural Materials
- Rabbit Zonkers
- Ribbing Material
- Rubber Legs
- Scissors & Tools
- Thread
- UV Resins and Glues
- Whiting Farms Hackle
- X-Crab Legs
- Waders and Boots
- Hunters Element
- Casting Lessons
- Postage
- Blog
- Contact Us
- Friends
- Clearance/Sale